Deploy a model on the Inference platform using the Dashboard
Requirements
🔒 You need a platform account with full access level.
The Dashboard offers the possibility to deploy an AI module as serverless on the platform resources.
✅ Pros |
❌ Cons |
|---|---|
|
|
1. Choose your module and deploy
The first step is to choose a module from the Dashboard.
Under the Platform Categories tag section, select any module that has the tag AI4 Inference.
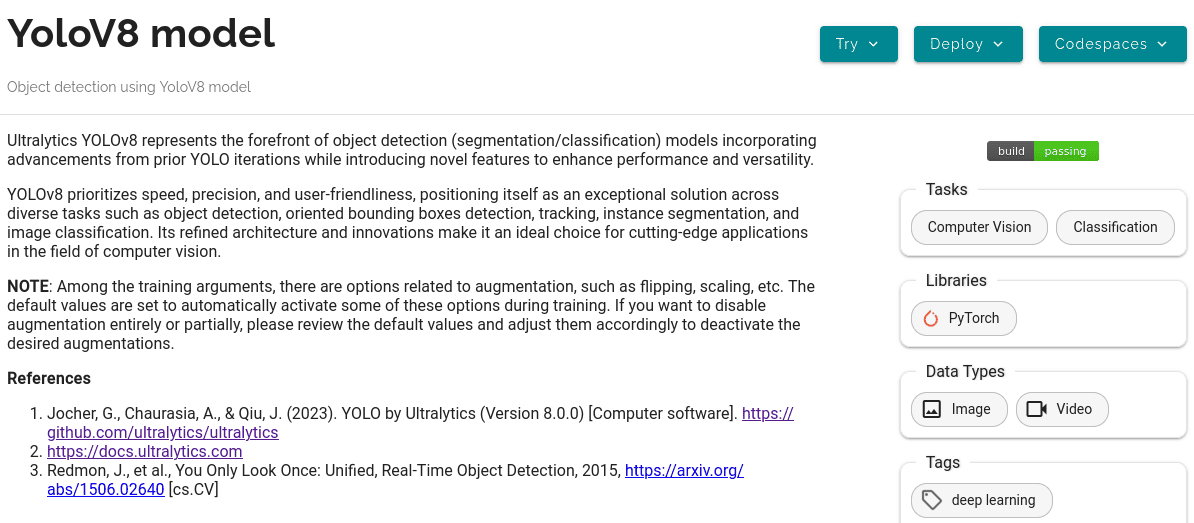
In this tutorial, we will demonstrate a simple prediction using the popular YOLO module.
In the module page, click on the option Deploy > Inference API (serverless).
This will automatically deploy your OSCAR service with some predefined configuration.
Module compatibility
Inference endpoints only work for models that return a JSON response (that is the case for most models).
Modules require a DEEPaaS version higher than
2.5.0to work with OSCAR inference endpoints (that is the case for most models). If the module does not have a supported DEEPaaS, it will return a clear error message when trying to make an inference.
2. Make a prediction
Retrieve the service information
In the Inference tab, go to the Serverless (OSCAR) table and find your newly created service.
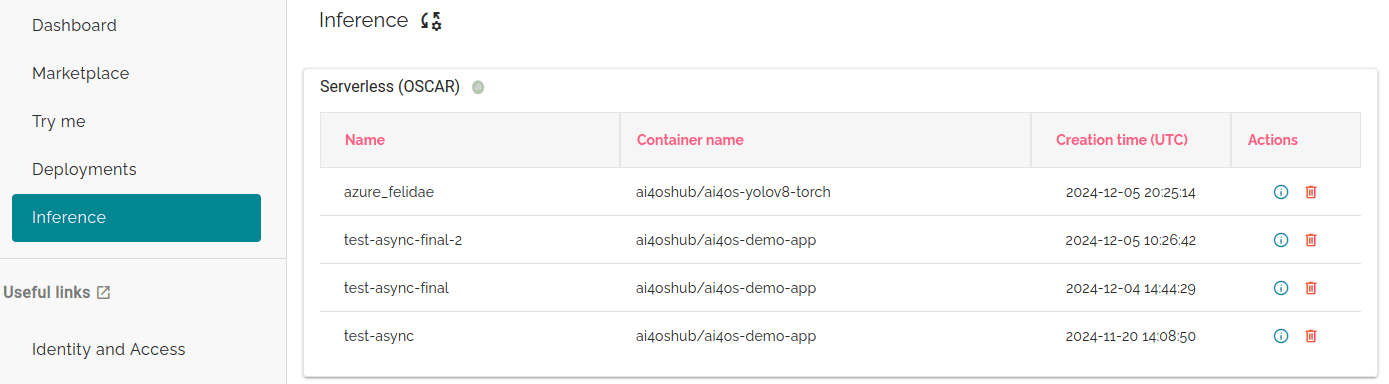
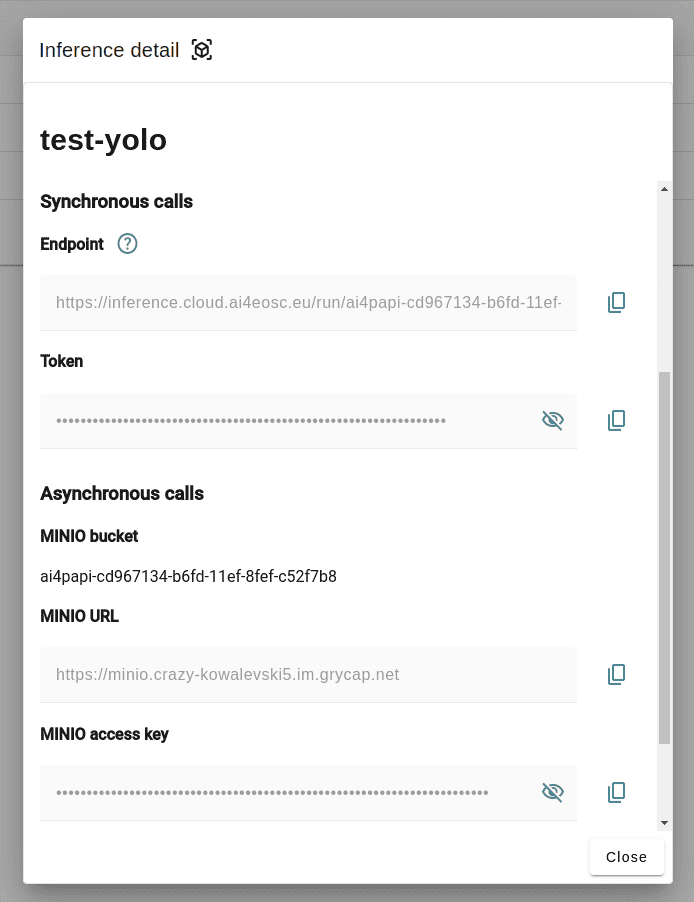
Click on Info for your service and you will find all the variables you need for making a prediction:
for synchronous calls: the
endpointyou will query and the secrettokenyou need for authentication.for asynchronous calls: all the variables related to the MINIO storage that handles your predictions.
Finding the model inputs
Before making a prediction with that service, you first need to know what are the required inputs the model needs.
The following Python script demonstrates how to make a synchronous call asking for help.
To use the script, you have to replace the endpoint and token variables with the values retrieved above.
ㅤ 📄 Help Python script
import base64

import requests


endpoint = "https://inference.cloud.ai4eosc.eu/run/ai4papi-***********************"
token = "*************************************************************************"

data = {"help": ""}
headers = {
    "Content-Type": "application/json",
    "Authorization": f"Bearer {token}",
}
r = requests.post(url=endpoint, headers=headers, json=data)

if r.status_code == 401:
    raise Exception("Invalid token.")
if not r.ok:
    raise Exception(f"Some error has occurred: {r}")

print(r.text)
In this case, we receive what are the inputs needed by the YOLO model.
[...]
options:
-h, --help
        show this help message and exit
--files FILES
        Input an image or Video.
        accepted image formats: .bmo, .dng, .jpg, .jpeg, .mpo, .png, .tif, .tiff, .pfm, and .webp.
        accepted video formats: .asf, .avi, .gif, .m4v, .mkv,.mov, .mp4, .mpeg, .mpg, .ts, .wmv, .webm
        Type: str (filepath)
        *Required*
[...]
Response status codes
If the call returns a 502 error, you should wait a bit more, your docker image is probably getting pulled!
If the error persists, please contact support.
Synchronous predictions
Now that we know the inputs needed, it’s time to make a synchronous prediction call on a bear image with the YOLO model service.
The following Python script demonstrates how to make a synchronous call with some model inputs. It is important to note that:
All parameters for the model should be passed inside a JSON payload.
If the model needs a file (as it is the case here), it should be passed encoded as base64 in the
oscar-filesfield in the data.
As before, to use the script, you have to replace the endpoint and token variables with the values retrieved above.
ㅤ 📄 Synchronous prediction Python script
import base64

import requests


endpoint = "https://inference.cloud.ai4eosc.eu/run/ai4papi-***********************"
token = "*************************************************************************"

def get_base64(fpath):
    with open(fpath, "rb") as f:
        encoded_str = base64.b64encode(f.read()).decode("utf-8")
    return encoded_str

data = {
    "oscar-files": [
        {
            "key": "files",
            "file_format": "jpg",
            "data": get_base64("./bear.jpg"),
        },
    ]
}
headers = {
    "Content-Type": "application/json",
    "Authorization": f"Bearer {token}",
}
r = requests.post(url=endpoint, headers=headers, json=data)

if r.status_code == 401:
    raise Exception("Invalid token.")
if not r.ok:
    raise Exception(f"Some error has occurred: {r}")

print(r.text)
The script will print the logs, along with the JSON output of the model (in this case, the prediction made by YOLO).
[...]
2024-09-30 12:09:19.502 29 INFO deepaas.cmd.cli [-] return: ['[\n  {\n    "name": "bear",\n    "class": 21,\n    "confidence": 0.93346,\n    "box": {\n      "x1": 109.39322,\n      "y1": 26.39718,\n      "x2": 627.42999,\n      "y2": 597.74689\n    }\n  }\n]']
[...]
Asynchronous predictions
It is also possible to make asynchronous calls to the same service. This kind of execution relies on the event-driven approach, where the OSCAR service reacts automatically to events that occur in the object-storage system so that the interaction is directly done uploading files to the buckets in the MinIO storage system.
This approach is especially beneficial when:
You have lots of data. This is because you upload all the data to the Minio bucket, and we will process that data in parallel. When the predictions are completed you can retrieve them from the bucket.
You need to automatize the processing of the predictions. This is because with this approach we save separately the logs (in a
.logfile) and the predictions (in a.jsonfile). If the prediction was not successful, you will only retrieve the log file.
The following Python script demonstrates how to upload some inputs to the bucket, list the contents of the bucket and download the outputs when the predictions are ready.
To use the script, you have to replace the Minio-related variables with the values retrieved above.
ㅤ 📄 Asynchronous prediction Python script
import base64
import json
import time

import boto3


# This information is retrieved from your deployment information window
MINIO_BUCKET = "ai4papi-*************************************************"
MINIO_URL = "https://****************************************************"
MINIO_ACCESS_KEY = "**********************************************@egi.eu"
MINIO_SECRET_KEY = "*****************************************************"

# This is how you decide to name your new prediction
prediction_ID = "test-prediction"

# Local paths (in current folder)
pth_local_input = f"input-{prediction_ID}.json"
pth_local_output = f"output-{prediction_ID}.json"
pth_local_logs = f"output-{prediction_ID}.log"

# Remote paths (in the bucket)
# Two files will be produced in the output folder of the bucket
# * <input_filename>.json: this file has the output of the prediction, in JSON format.
#   --> this will only be created if the prediction is successful
# * <input_filename>.log: this file has the logs of the prediction.
#   --> this will always be created
pth_remote_input = f"inputs/{prediction_ID}.json"
pth_remote_output = f"outputs/{prediction_ID}.json"
pth_remote_logs = f"outputs/{prediction_ID}.log"

# Prepare the data you want to predict
def get_base64(fpath):
    """
    Encode files as base64. We need to do this to pass files as prediction inputs in
    the JSON file.
    """
    with open(fpath, "rb") as f:
        encoded_str = base64.b64encode(f.read()).decode("utf-8")
    return encoded_str

data = {
    "oscar-files": [
        {
            "key": "files",
            "file_format": "jpg",
            "data": get_base64("./bear.jpg"),
        },
    ]
}

# Create the JSON file
with open(pth_local_input, "w") as f:
    json.dump(data, f)

# Init the Minio Object Store
client = boto3.client(
    "s3",
    endpoint_url=MINIO_URL,
    region_name="",
    verify=True,
    aws_access_key_id=MINIO_ACCESS_KEY,
    aws_secret_access_key=MINIO_SECRET_KEY,
)

# Check if input file already exists in bucket, if so delete it to make the prediction again
try:
    client.head_object(Bucket=MINIO_BUCKET, Key=pth_remote_input)
    client.delete_object(Bucket=MINIO_BUCKET, Key=pth_remote_input)
    print(f"Deleted existing file {pth_remote_input} from bucket {MINIO_BUCKET}")
except client.exceptions.ClientError as e:
    if e.response["Error"]["Code"] == "404":
        print(f"No existing file {pth_remote_input} found in bucket {MINIO_BUCKET}")
    else:
        raise

# Upload the inputs to the bucket
with open(pth_local_input, "rb") as data:
    client.upload_fileobj(data, MINIO_BUCKET, pth_remote_input)
print(f"Uploaded data to {pth_remote_input} in bucket {MINIO_BUCKET}")

# Now we wait until the prediction is made
while True:
    # List objects in the bucket
    r = client.list_objects_v2(Bucket=MINIO_BUCKET)
    contents = [i["Key"] for i in r["Contents"]]

    # If the output is available, download it
    if pth_remote_logs in contents:
        with open(pth_local_logs, "wb") as data:
            client.download_fileobj(MINIO_BUCKET, pth_remote_logs, data)
        print(f"Downloaded logs from {pth_remote_logs} in bucket {MINIO_BUCKET}")

        # Prediction JSON will only be available if the prediction was successful
        if pth_remote_output in contents:
            with open(pth_local_output, "wb") as data:
                client.download_fileobj(MINIO_BUCKET, pth_remote_output, data)
            print(f"Downloaded data from {pth_remote_output} in bucket {MINIO_BUCKET}")

        break

    else:
        print("Waiting for the prediction to complete ...")
        time.sleep(5)
This script will produce a .log file with the OSCAR logs and a .json file with the prediction of the YOLO model.
Using the OSCAR Web UI interface
Another option to interact with the OSCAR service is through the graphical web interface (UI):
To access the OSCAR service through the UI, follow these steps:
In the
Inferencetab, go to theServerless (OSCAR)table and find your newly created service.Click on
Infobutton on the right to show the service details and check theDeployment ID.Go to the OSCAR UI in your browser, log in with your credentials and search for the service with the same name as the
Deployment ID.Click on the
More Actionsbutton of your service and selectInvoketo open a new screen where you can provide the input to the service invocation. At this point, as you have seen in the asynchronous and synchronous calls, you have to take into account that most of the AI Module whose input is an image need to convert the input into a compatible JSON format. This implies converting the image to base64 and expressing the input in a JSON file. To help with this input preparation, we provide you a short Python script to convert your file into a compatible JSON format:ㅤ 📄 Data preparation Python script
import base64
import json

def get_base64(fpath):
    """Encodes a file in Base64 format."""
    with open(fpath, "rb") as f:
        encoded_str = base64.b64encode(f.read()).decode("utf-8")
    return encoded_str

# Prepare the JSON payload
data = {
    "oscar-files": [
        {
            "key": "files",
            "file_format": "png",
            "data": get_base64("./inputs_Cat.png"),
        },
    ]
}

# Save the JSON data to a file
with open("input2.json", "w") as f:
    json.dump(data, f, indent=4)
Once your file is ready, you can use it to invoke the service using the
Runbutton.
3. More info
Make a prediction using Bash
For completeness sake, we provide the equivalent commands to perform the above operations in Bash, instead of Python.
ㅤㅤ 📄 Synchronous call with YOLO (Bash)
Find the input parameters needed by the model:
$ curl --location '***endpoint***' \
    --header 'Content-Type: application/json' \
    --header 'Authorization: Bearer ***token***' \
    --data '{"help": ""}'
Make a synchronous call with an image input:
# Create a JSON payload with the base64 data and save it to a temporary file
JSON_PAYLOAD=$(cat <<EOF
{
"oscar-files": [
    {
    "key": "files",
    "file_format": "jpg",
    "data": "$(base64 /home/iheredia/bear.jpg | tr -d "\n")"
    }
]
}
EOF
)

# Save the JSON payload to a temporary file
TEMP_JSON_FILE=$(mktemp)
echo "$JSON_PAYLOAD" > "$TEMP_JSON_FILE"

# Step 3: Use curl to send the request with the JSON payload from the temporary file
curl --location ***endpoint***' \
--header 'Content-Type: application/json' \
--header 'Authorization: Bearer ***token***' \
--data @"$TEMP_JSON_FILE"

# Clean up the temporary file
rm "$TEMP_JSON_FILE"
Learn how to feed different input types
We are going to demonstrate how to send a more complete set of input parameters to OSCAR.
For educational purposes, we are going to use the official demo module. While this model does not perform an AI task, it is very helpful as it shows the wide variety of inputs that can be sent to OSCAR inference endpoints.
So go back to the previous steps and deploy the ai4os-demo-app. Once you have retrieved your endpoint and token, you can run the following Python script to make the prediction from your local computer:
ㅤㅤ 📄 Synchronous call with the demo app (Python)
import ast
import base64

import requests


token = '*************************'
url = '***************************'

headers = {
    'Content-Type': 'application/json',
    'Authorization': f'Bearer {token}',
}

def get_base64(fpath):
    with open(fpath, "rb") as f:
        encoded_str = base64.b64encode(f.read()).decode('utf-8')
    return encoded_str

data = {
    'demo_str': 'hi there!!!!',
    'demo_str_choice': 'choice1',
    'demo_int': -3,
    'demo_int_range': 42,
    'demo_float': -0.9,
    'demo_bool': False,
    'demo_dict': '{"c": "d"}',
    'demo_list_of_floats': "[1.2, -1.8]",
    'oscar-files': [
        {
            'key': 'demo_image',
            'file_format': 'png',
            'data': get_base64('./sample-image.png'),
        },
        {
            'key': 'demo_audio',
            'file_format': 'wav',
            'data': get_base64('./sample-audio.wav'),
        },
        {
            'key': 'demo_video',
            'file_format': 'mp4',
            'data': get_base64('./sample-video.mp4'),
        },
    ]
}
# data = {'help': ''}

r = requests.post(url=url, headers=headers, json=data)
out = r.text

if r.status_code == 401:
    raise Exception('Invalid token.')

print(out)
Manually deploying in OSCAR UI
Do you want to manually deploy your OSCAR services for greater customization? Check how to Manually deploy a serverless inference endpoint.
For example, you can use manual serverless deployments for example a large number of files (eg. historical data) all at once (OSCAR batch mode). If you need help setting this usecase, please contact support.