Train in batch mode
Requirements
🔒 You need a platform account with full access level.
This is a step by step guide on how to train a model with your own dataset in batch mode. In batch mode, you will create a create a temporary job that is killed after the training is completed.
We are aware that batch mode is not as convenient for end users as standard mode, where you are given a persistent deployment that you can use with an IDE. Nevertheless, batch mode is preferable platform-wise because resources are optimally allocated.
To promote the usage of batch mode between users, we have dedicated Tesla V100 GPU nodes exclusively devoted to batch mode.
Batch mode can be used very similarly to standard mode, most of the tutorial still applies:
You start by preparing your data,
You create a batch job with the commands you want to run,
Your model weights are saved in the Storage when the job is completed,
You finally follow the same steps to add your model to the Marketplace,
What can I deploy in batch mode?
You can deploy any existing module in the marketplace.
To create a batch job, click on the Batch button in the module detail.
It’s also possible to redeploy from a snapshot. In this case, a typical workflow would be for example:
to develop a model in a CPU deployment using VScode,
when you feel the model is ready to be trained, create a snapshot of your deployment,
in the snapshot table, redeploy your snapshot in batch mode
Configuring a batch job
Batch mode is very similar to standard mode configuration. The main differences are the following.
Storage
In batch mode, it is mandatory to connect a storage to your job. This is done because:
you need data to train, usually located in the storage (not in the Docker image itself)
since the job is killed when it concludes, you cannot directly access the job to retrieve any outputs. So you need to save your modelweights in your storage to be able to retrieve them afterwards.
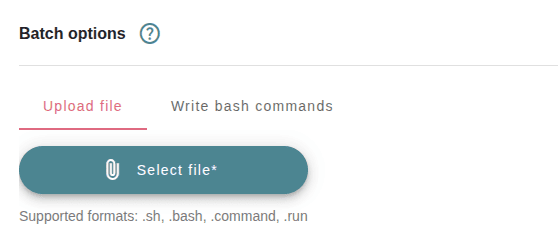
Batch commands
These are the commands your job will execute. In the configuration form, they can be provided either via a file upload or by adding the commands into an integrated editor.
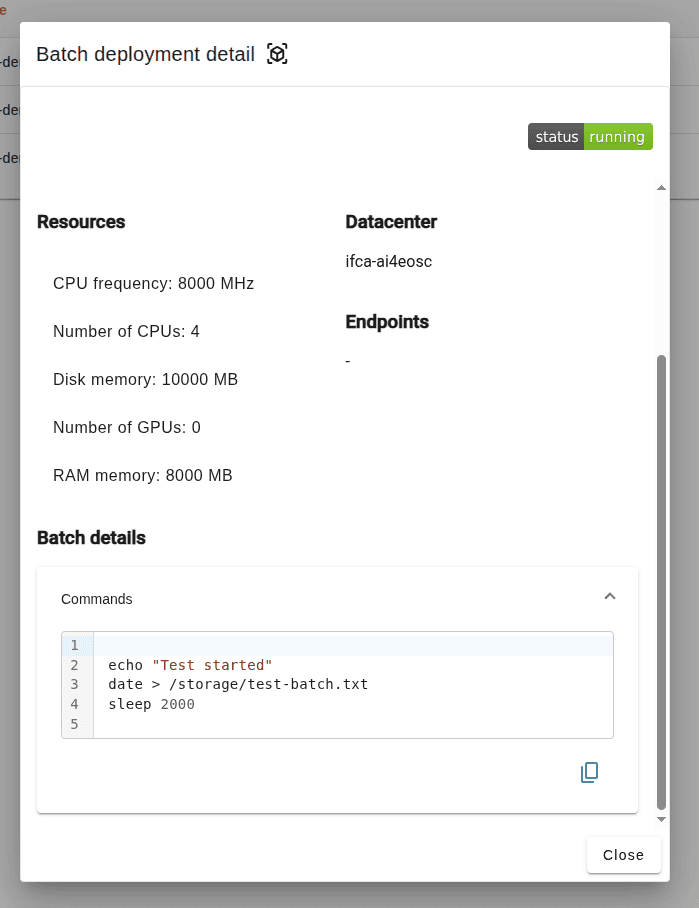
In the following dummy example, we can save the current date in our storage, mimicking the saving of the modelweights at the end of a real training.
echo "Test started"
date > /storage/test-batch.txt
sleep 20
Listing batch jobs
In the Batch tab on the left of the Dashboard, you will be able to see what are your current batch jobs, as well as the batch jobs that completed in the last 24 hours.
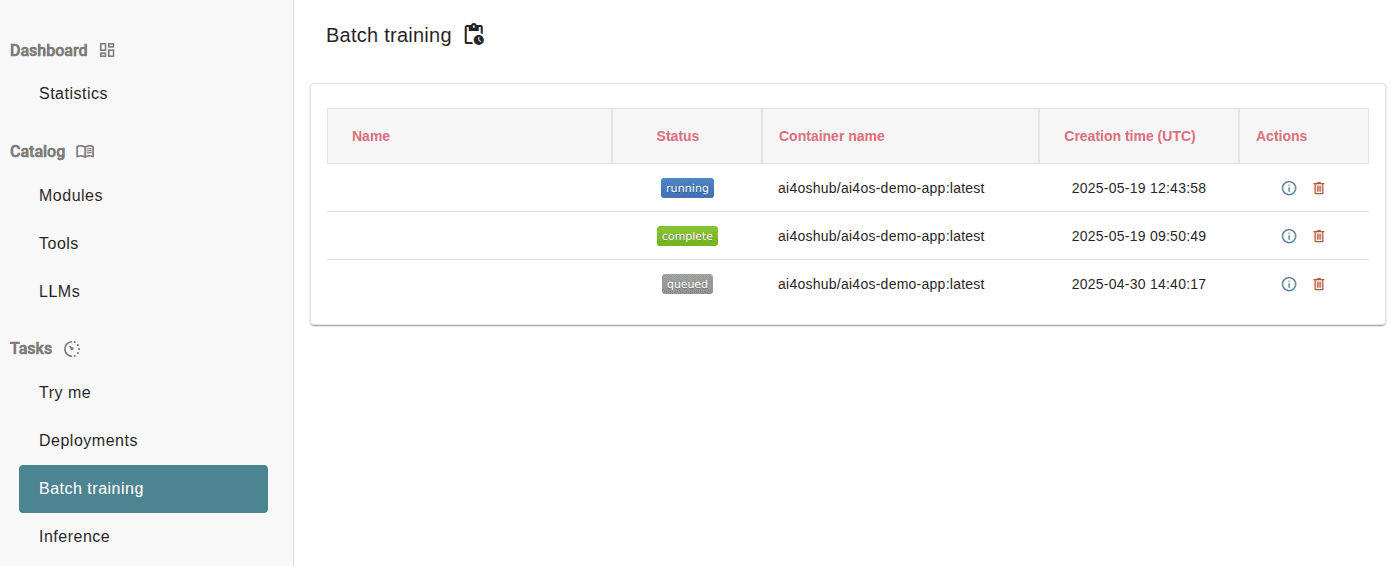
Clicking on the job details you will see the resources as well as the training commands that the job executed.
Once you batch job is completed, you should be able to retrieved the modelweights from Nextcloud if you had a saving step in your training script. Additionally, if your model is integrated with MLflow you should be able to view your training stats in the MLflow UI.